How To Repurpose A Dated Vintage Furniture Piece
If you love an easy makeover project, this post is for you! I’m sharing how to repurpose a dated vintage furniture piece that has been in my family for probably 100 years.
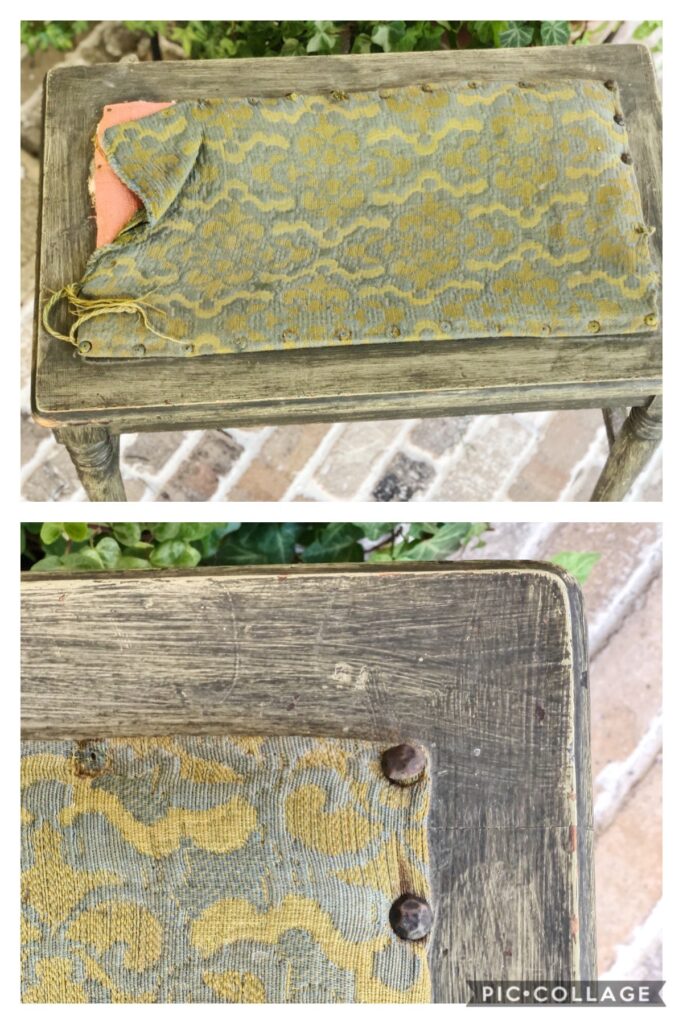
This piano stool was my great grandmother’s. It has been passed down through the years to my grandmother, then my mother, and now me. It’s been painted and repainted multiple times.

I inherited it many years ago, with the intention of recovering and repainting it, and just never got around to it.
Recently, I cleaned out and organized my closet and wanted a small stool for a place to sit inside my closet to put on my shoes.
I thought the stool would be perfect so it was time for this vintage stool makeover.
the process for repurposing my dated vintage furniture piece
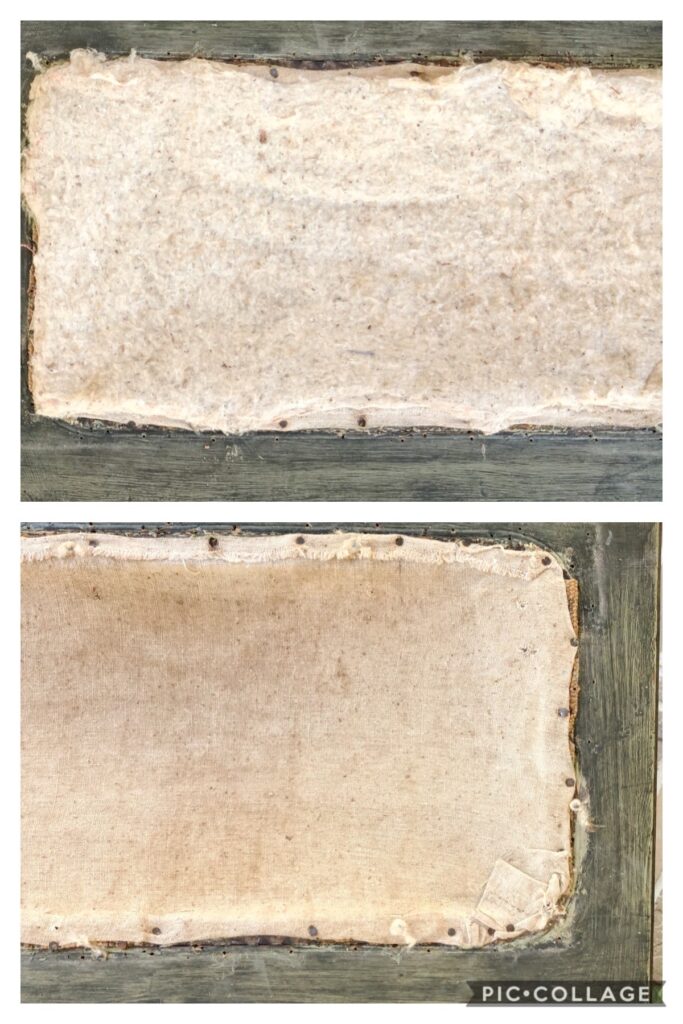
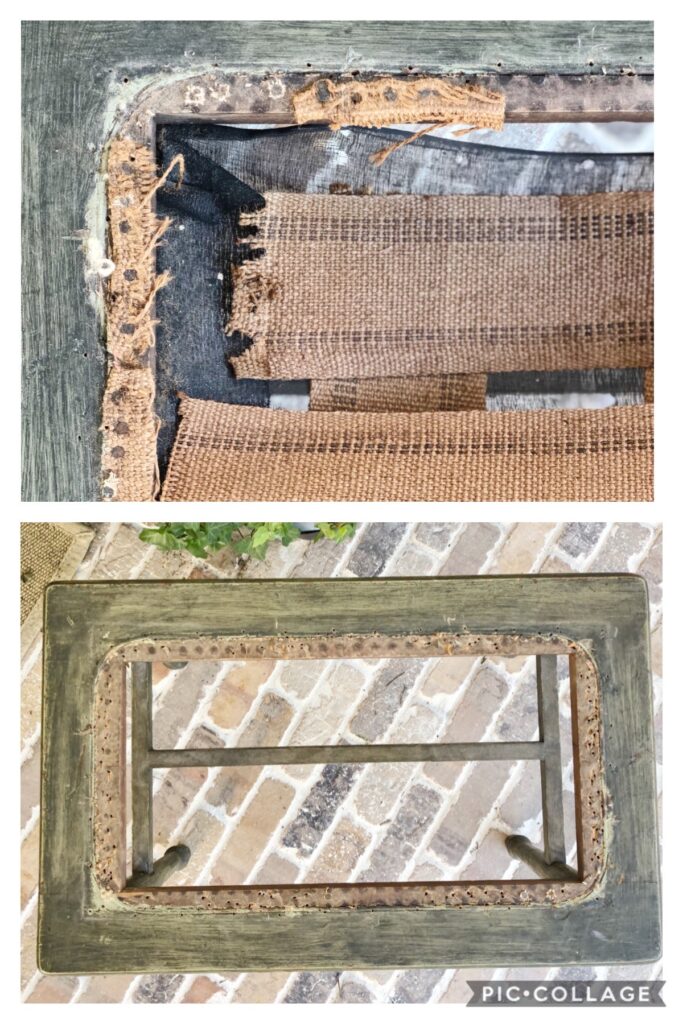
I started by removing the old upholstery tacks and the layers of lining and batting underneath the top layer of fabric. And also, the webbing underneath it all.
There were about a million little tack nails on each layer, so this part was tedious, to say the least.
I actually loved the aged look of each layer, but it was so old, it had to be replaced to make it usable.
painting my vintage furniture piece
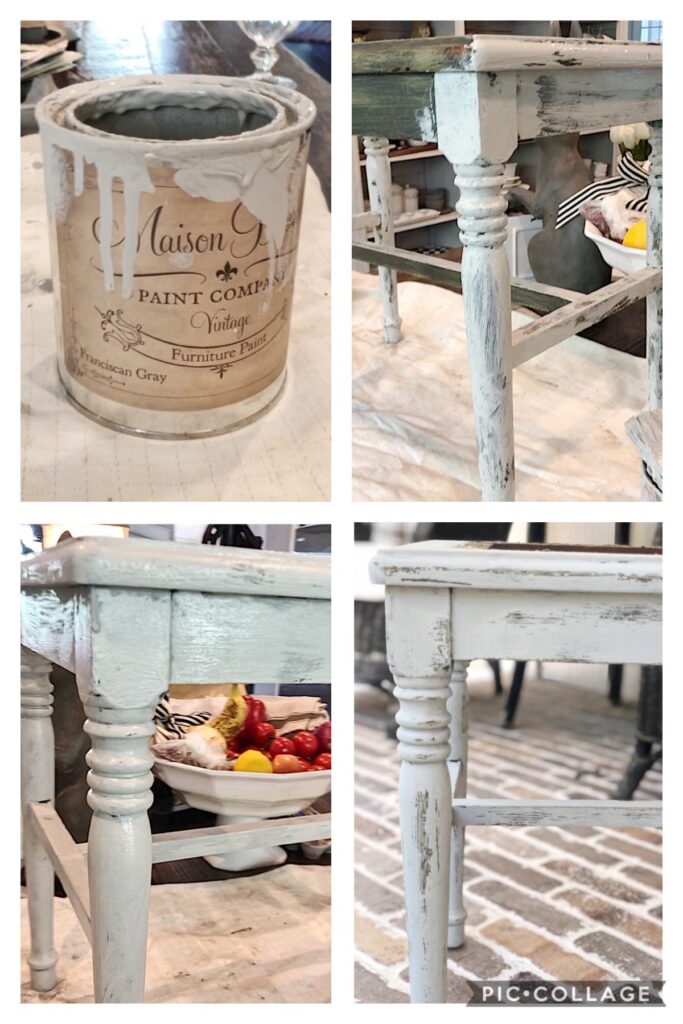
Next up, was painting. I used Maison Blanche paint in Fransiscan Gray. I did a quick first coat, that didn’t even completely cover, then came back with a second coat.
Once the paint was dry, I did a slight distressing with my electric sander and finished with a light coat of light brown wax.
These photos show the 1st and 2nd coat, then the finished paint job. I completely forgot to get a picture between distressing and waxing.
reinforcing my repurposed vintage piece
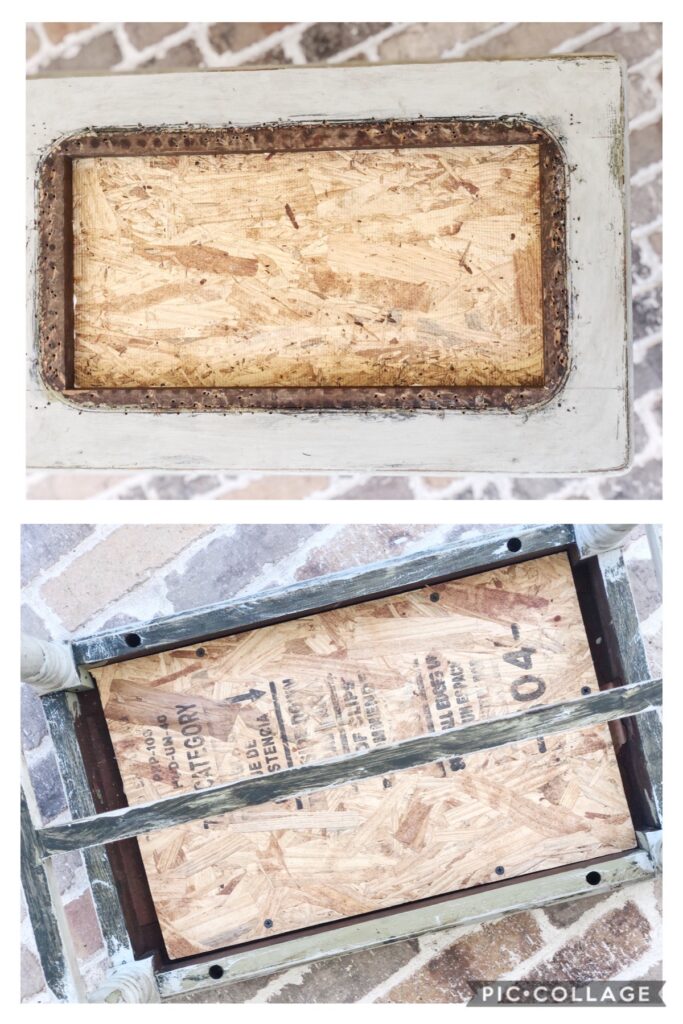
I had to figure out a way to reinforce the seat, since the old webbing was completely falling apart.
My husband cut a piece of plywood to fit inside the underneath of the stool. He cut the wood just slightly larger than the opening and put a few screws in to hold it in place.
The first photo shows the top view and the second photo is the underneath view.
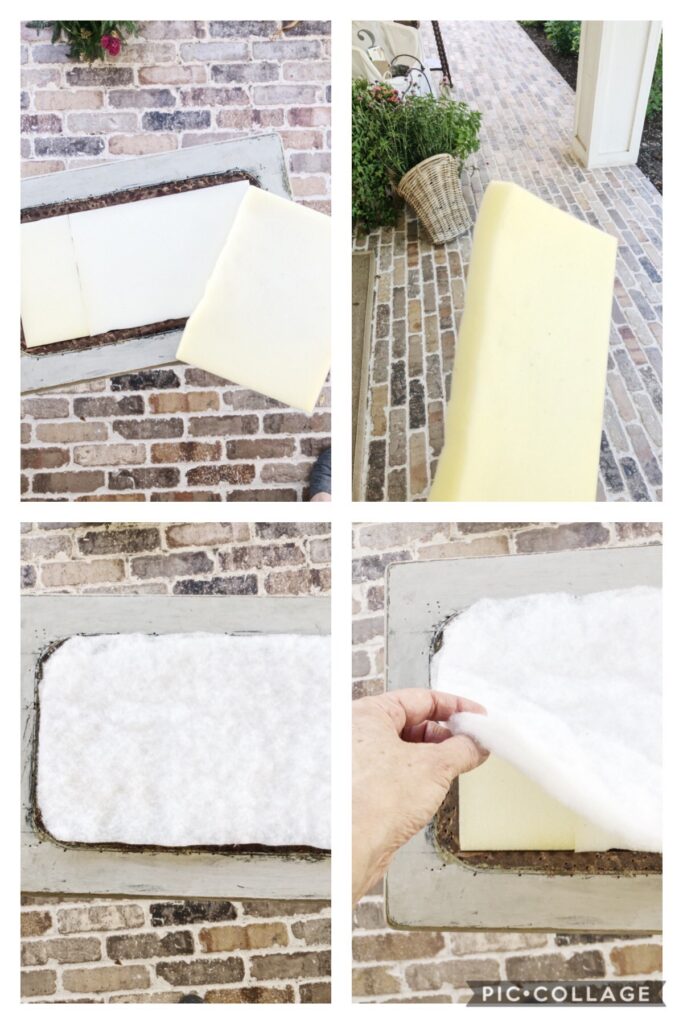
The batting and lining fabric had to be replaced, and I happened to have a piece of 1″ foam on hand, so I cut it to fit inside the opening of the stool.
I hot glued the foam to the plywood to make sure it stayed in place.
Next, I added a double thickness of quilt batting, and just laid the batting over the top of the foam, knowing that when I added my final fabric, it would be tacked down and stay in place.
A french grainsack with a gray stripe down the center was what I chose for the final fabric.

I cut a piece of the grainsack just slightly larger than the stool opening, making sure the stripe would be centered and there was enough fabric to fold it over twice to create a finished edge.

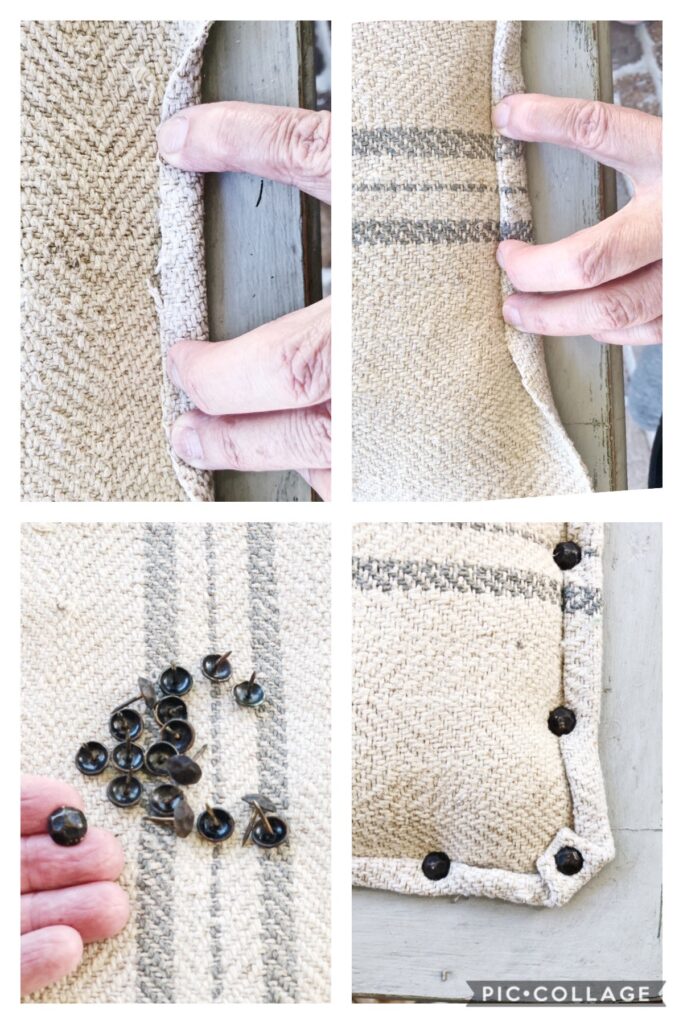
I folded the fabric over once, then a second time to create a finished edge. The fabric could have been folded under, but decided I liked the look of this.
The only problem, because I did it this way, was the corners. They were a bit of a challenge, but I kept working with it and they turned out fine.
I reused the old upholstery tacks because I liked the look of the aged ones. But these are readily available at craft and hardware stores.
the finished/repurposed vintage piano stool


I love how it turned out and that I was able to give a very old family piece new life!!
This was a bit time consuming, but a very inexpensive makeover, since I already had the plywood for the top, the pieces of foam, quilt batting and the french grainsack.
I also used chalk paint I had on hand and reused the upholstery tacks.
I hope this “How To Repurpose A Dated Vintage Furniture Piece” post has inspired you to pull out that old piece from your garage or attic and give it a makeover.
blessings
shop the post

Be sure and Pin It to remember it….

If you enjoyed this post, you might like this drop leaf table makeover….
https://vintagehomedesigns.com/drop-leaf-table-makeover/

or this post about how to lighten a furniture piece with oven cleaner and bleach…..

You are THE best, sweet friend!! Have a happy weekend!
This is a beautiful makeover, Michele! I’m inspired!
Oh, so glad! Thank you so much for stopping by my blog!
Linda, it looks great! I love your choice of fabric and paint!
Smiles, Alice
Thank you! I appreciate you stopping by the blog!!
I really love the makeover and am planning to do the same with a chair of mine , now that I see how it’s done. I like the way the seat is kind of puffed up in the middle. Do you remember how thick the foam you used was? Thank you for sharing with us, this is so helpful!
Thank you so much!!
I think the foam was about 1″, then I used a double thickness of quilt batting on top of the foam.
Michelle I am new to your blog! After you just left a comment on my brick floors post, I came over to check out your blog and I am SWOONING! I am going to be here for days… Love this little stool makeover so much.
I would LOVE if you would link up your latest or favorite posts with us over at Thursday Favorite Things (Thursday-Sun): https://followtheyellowbrickhome.com/outdoor-summer-style-inspiration-at-tft/ or All-About Home (Mon-Thurs.) https://followtheyellowbrickhome.com/all-about-homelink-party-49/
I would be delighted to feature you!
Nice to meet you, and thank you so much for stopping by my blog!
Hey Amber, so glad you found me. And thanks so much for the kind words!!
I would love to join you!!
blessings,
michele
What an adorable piano stool with an amazing story to go with it, Michele! Love your upholstery on this – the vintage grain sack fabric is gorgeous! Pinned 🙂
Thanks Cindy! I was glad to finally repurpose it.
Michele,
I love that you repurposed a family treasure. Those are the best kind of finds.
This little stool was a diamond in the rough, and I love the beautiful transformation. The vintage grain sack fabric is perfect!
Thanks Michelle! I was really glad to finally use it and keep it in the family.
This turned out so cute, Michele! Love how the edging turned out; it fits the vintage vibe. Great job!
Thanks so much Lora! I was so happy to be able to give it a little update and use it in my home!
You did an excellent job on your stool, I love it!!
Thank you! I was so happy to give it new life and keep it in the family.
Thanks for this great tutorial! I have a chair needing a new seat, and this has given me some ideas on how to tackle it. Plus, I love that you saved this family piece.
Niky @ The House on Silverado
Oh good Niky! I’m so glad it gave you some inspiration!
This stool is so pretty. I love it.
Thank you Renae! I was so glad you give it a makeover and keep it in the family!