How To Make a DIY Block Print Jute Rug
I came up with a idea and want to show you how to make a DIY block print jute rug.
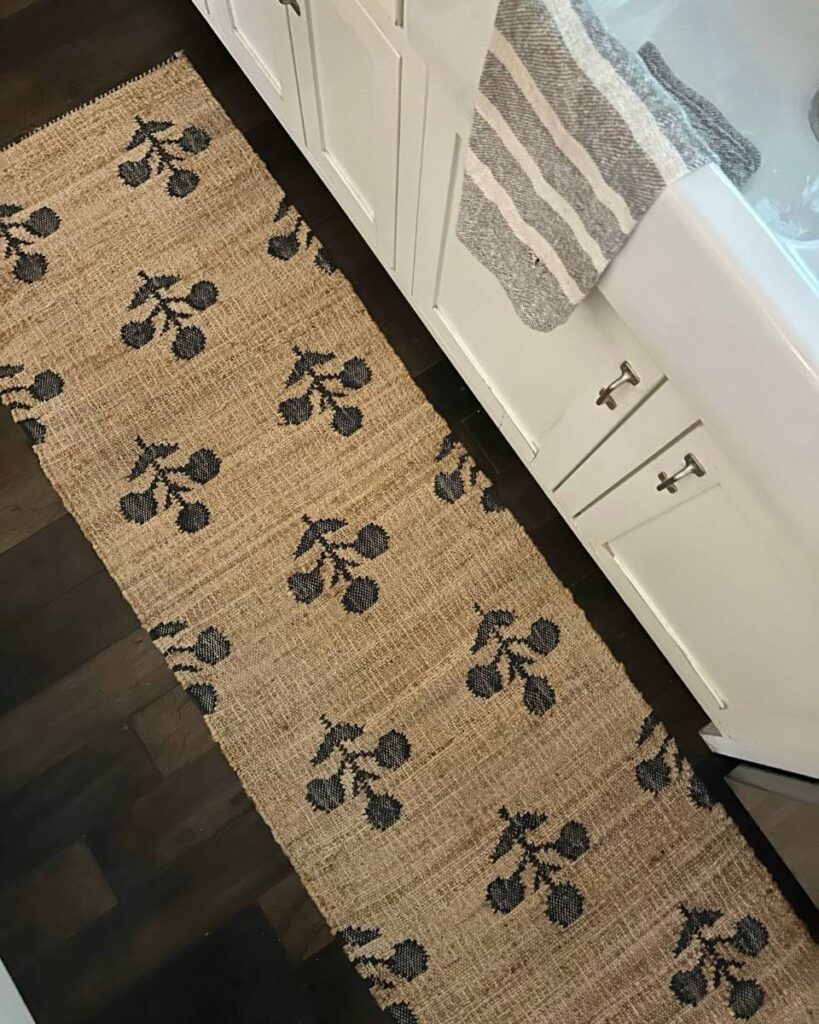
Recently, I purchased a block print jute rug runner for my kitchen. I loved it so much and decided I wanted one outside my front door.
Although my kitchen block print jute rug was on sale, it was still more than I wanted to pay for an outdoor rug since it will get dirty over time and need to be replaced.
That’s when the idea of making my own came to mind.
This post contains affiliate links which means if you purchase something, I make a small commission at no additional cost to you. Thank you for supporting my blog. You can read my full disclosure here.
Have you ever thought about making your own custom rug?
If you have the right materials, it is so easy!
You can make any pattern or color to go with your decor.
Let’s get started and I’ll show you exactly what you need and how to do it.
what is block printing?
Block printing is a centuries old technique that involves carving a design into a wooden block, then using an ink on the design.
The shapes were typically mandala design which are geometric shapes that are often in a circle but can sometimes be a square.
However, Indian block print patterns are often animal and bird designs.
The block can be used to print patterns on fabric or paper.
It is the earliest and slowest method of textile printing.
other ways of creating block print patterns
Although I wanted a block print look, the process of printing with ink on carved wooden blocks wasn’t practical for a jute rug.
So, I came up with another way to create a block print pattern look without using a wood block stamp process.
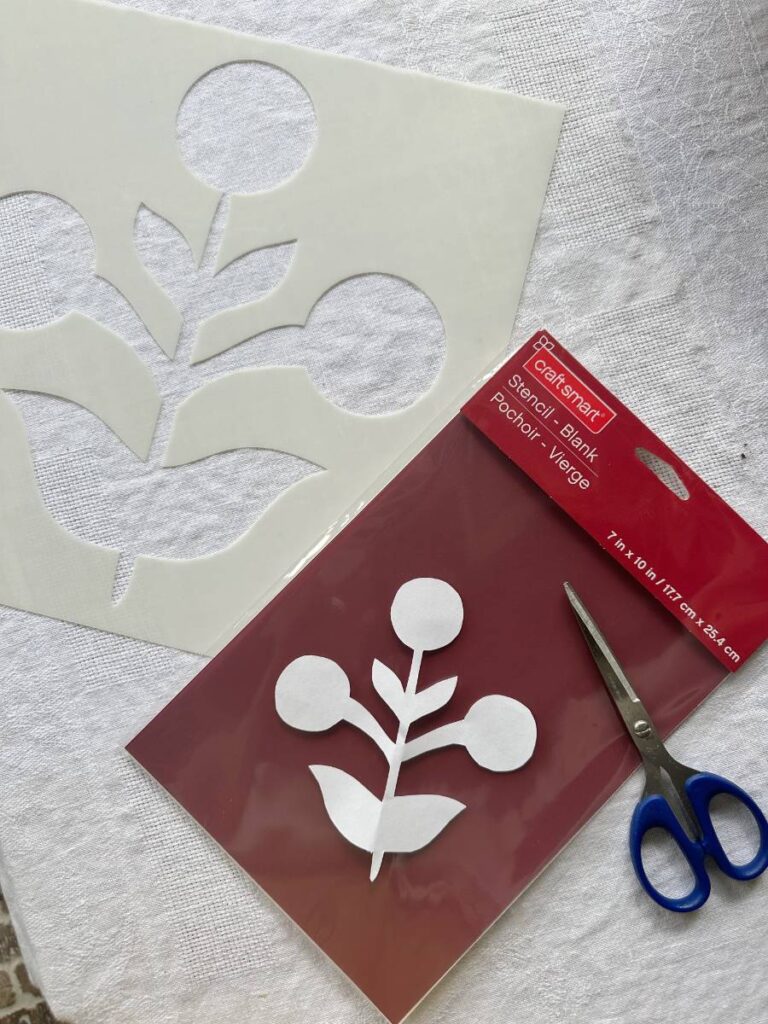
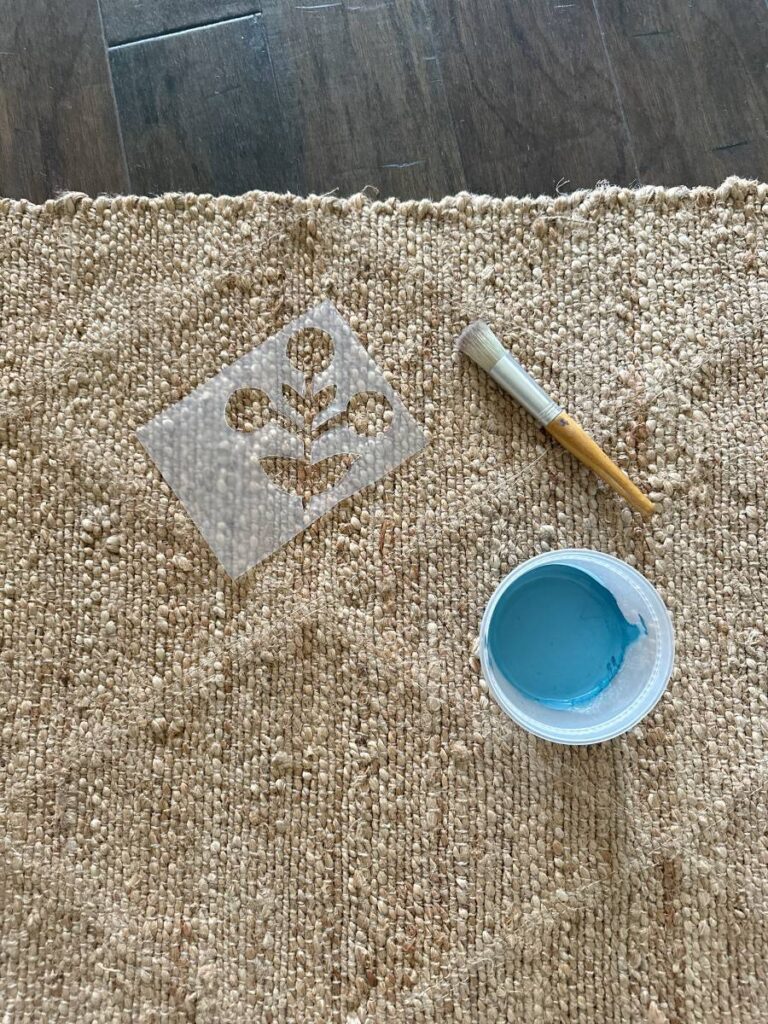
I purchased stencil paper from the craft store and created my own stencil pattern.
Then I used acrylic paint instead of an ink. More details about this process below.
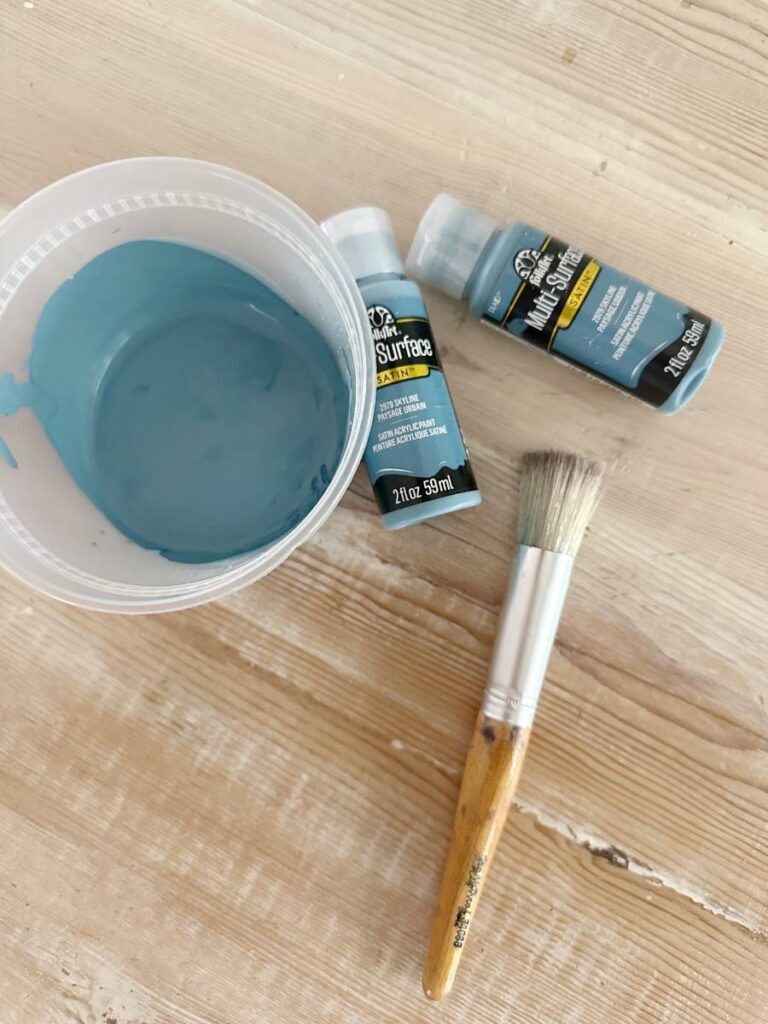
supplies for making a block print jute rug
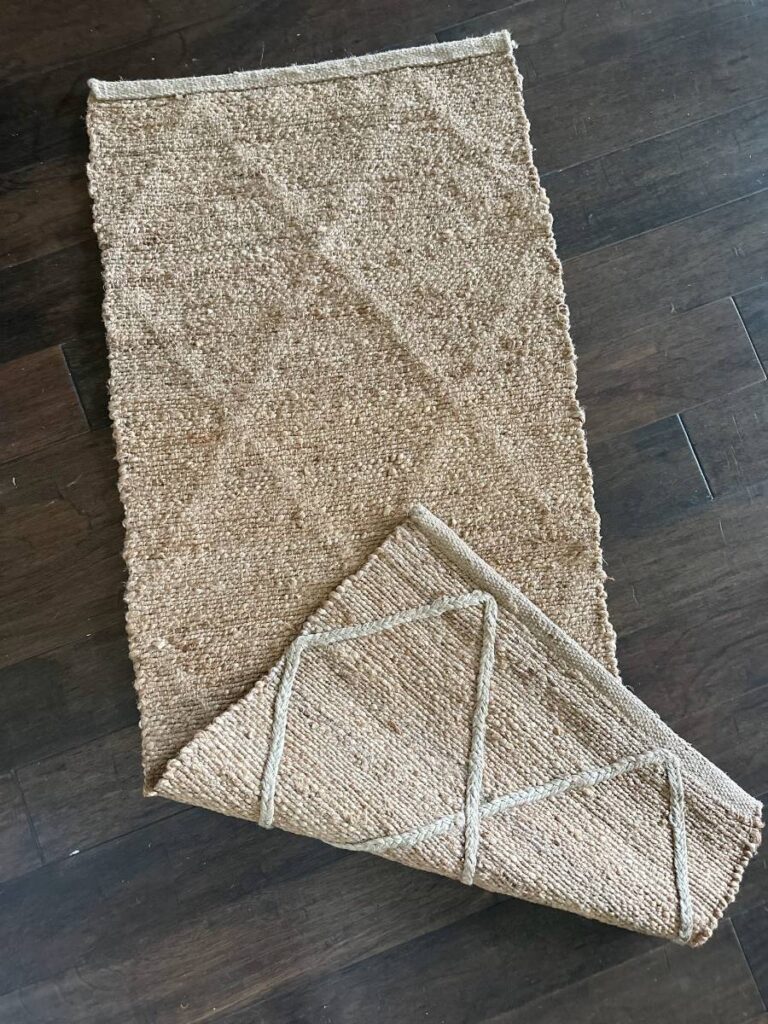
jute rug – there are different styles of jute rugs and they are also sometimes referred to as sisal rugs or natural fiber rugs. A low profile rug will work best for this process.
stencil – store bought or make your own (more about this below)
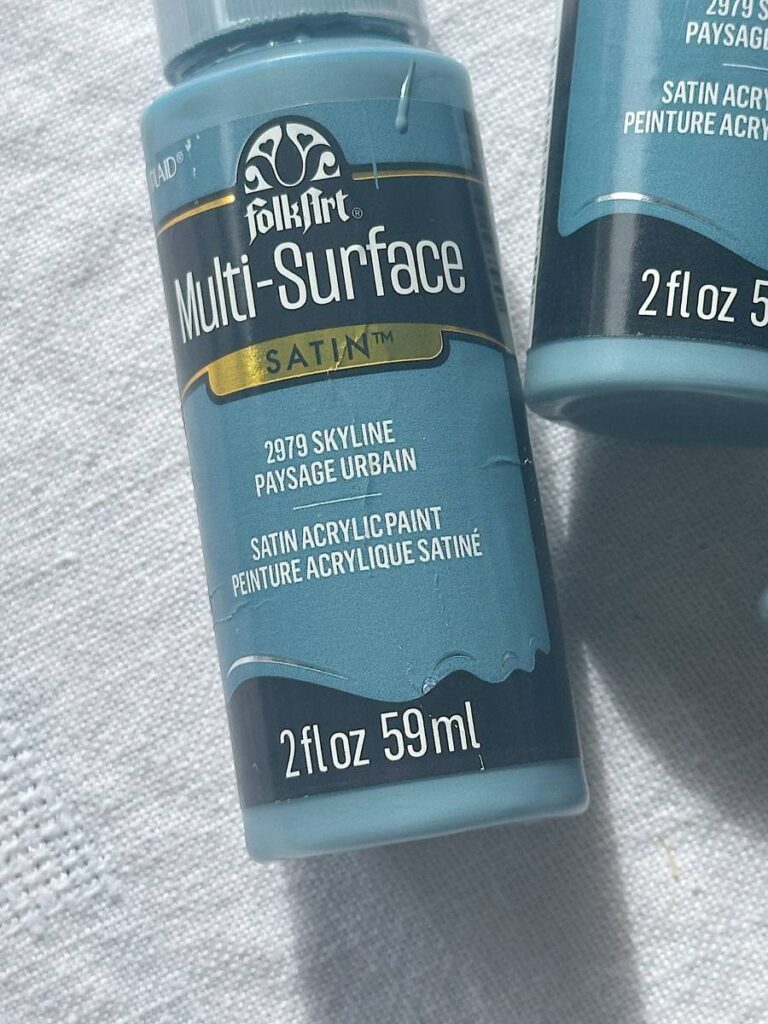
acrylic paint – I used small bottles of acrylic paint from the craft store, but you could use tubes of artist acrylic paints or even left over wall paint
stencil brush – there are different sizes of stencil brushes and you can use whatever size seems appropriate for the size stencil you are using
directions to make a block print jute rug
You will need to purchase or make a stencil that is the design you want for your rug.
I couldn’t find a stencil that was a pattern to resemble a block print design that I was wanting and was the correct size for my rug.
So, I ordered a wall/floor stencil on-line that was a pattern I liked.
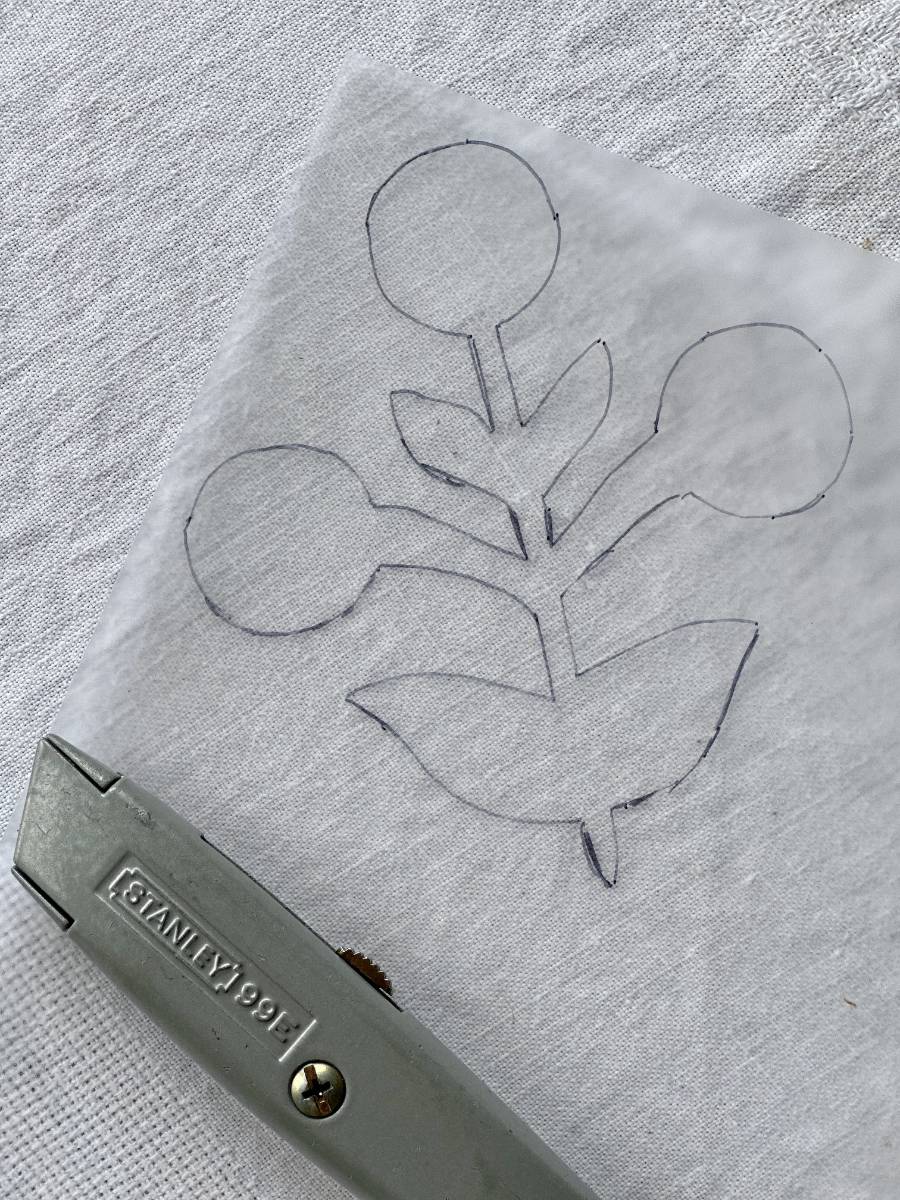
The size of the stencil was too large, so I traced the design onto a piece of paper and reduced it on my copy machine to the size I wanted.
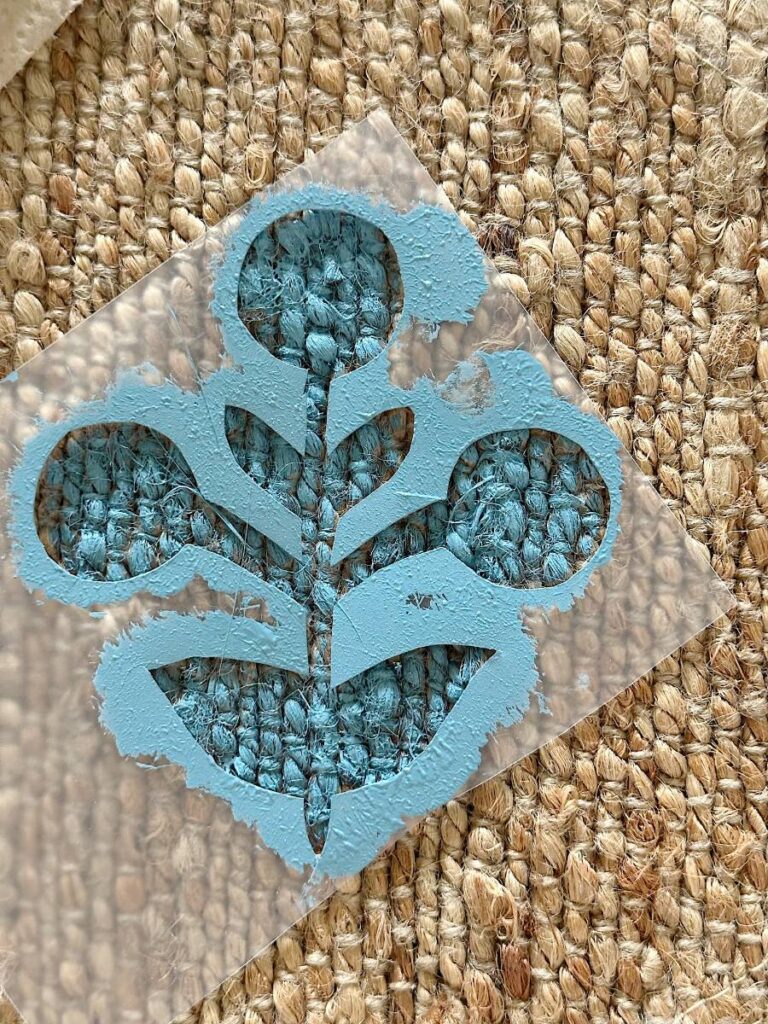
Then, I cut out the design and placed it on a piece of the stencil paper I purchased at the craft store.
The stencil paper is made of a heavy plastic sometimes referred to as acetate or mylar paper.
First, I traced around the pattern onto the stencil plastic with a marker.
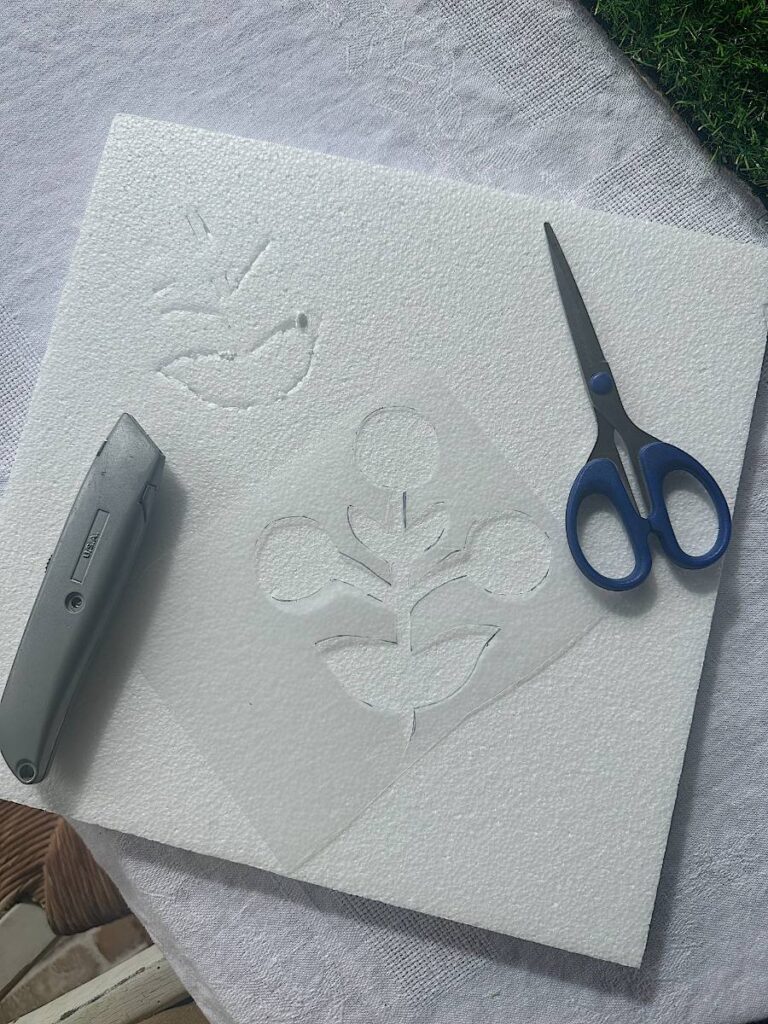
I carefully cut out my design using a sharp box cutter knife tool. I placed mine on a thin piece of stirofoam to keep from cutting through to my countertop, but you could also use a cutting board or something similar.
You can clean up the lines with small scissors when you have the stencil completely cut out if necessary.
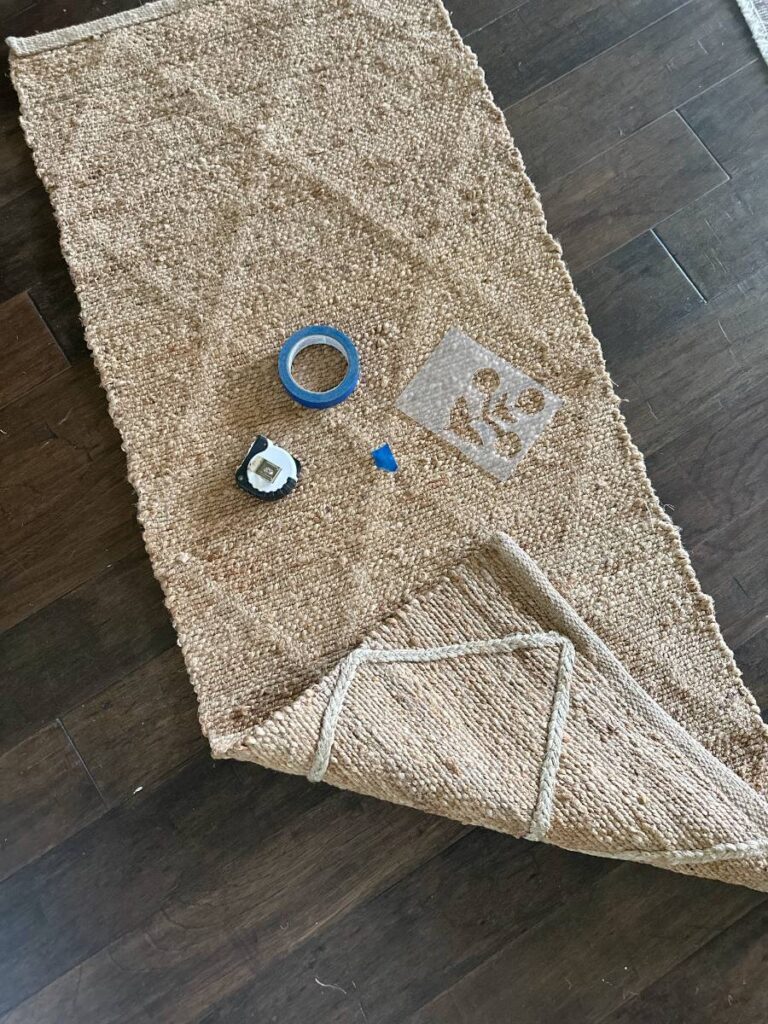
Next, you will need to decide the layout and spacing of the pattern on your rug.
You can measure and mark the places you want to have the stencil with painters tape if you like.
I just decided to eyeball my pattern because the rug I was using had a diamond shape grid-like pattern, so it was easy to see where my design needed to be.
And, I wasn’t real particular about it being perfect.
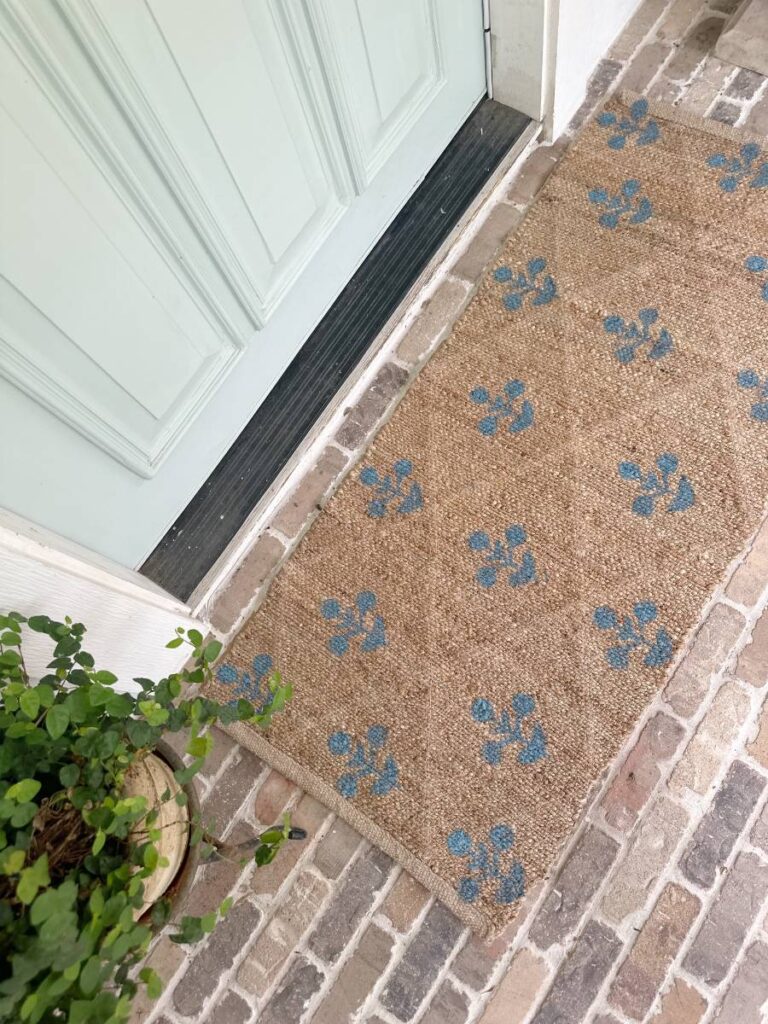
I couldn’t find a plain jute rug in the size I wanted, but I found one with a diamond pattern, so I used the reverse side of the rug for my stencil design.
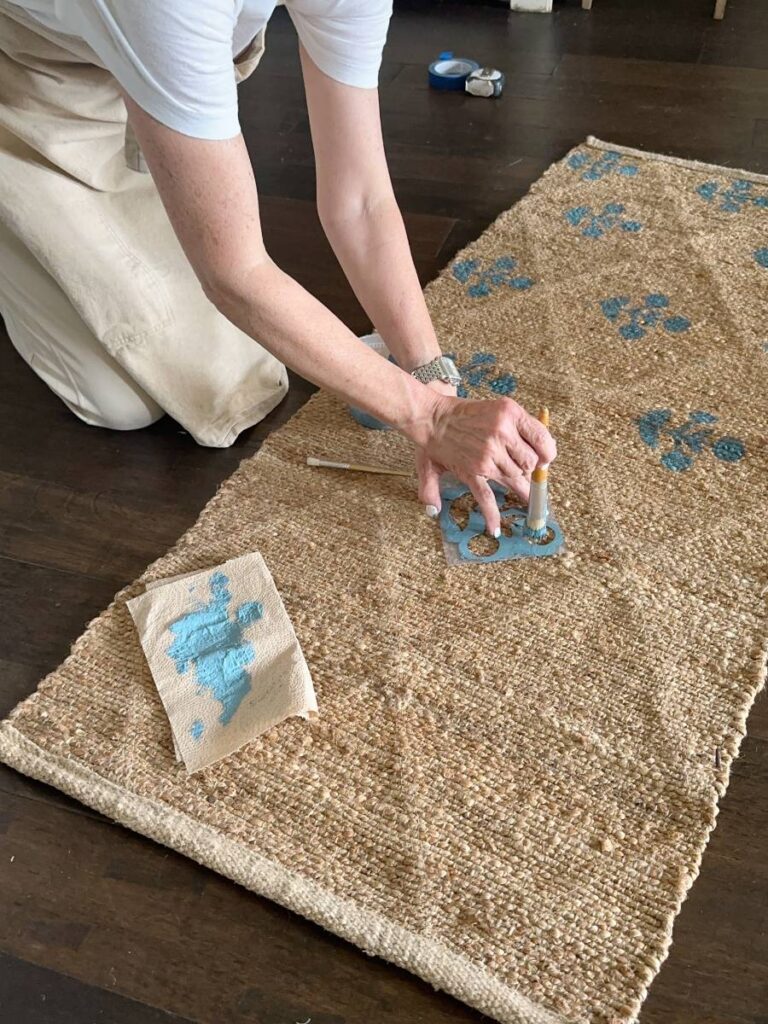
Lay your rug on a flat surface then place your stencil in the place you want the design.
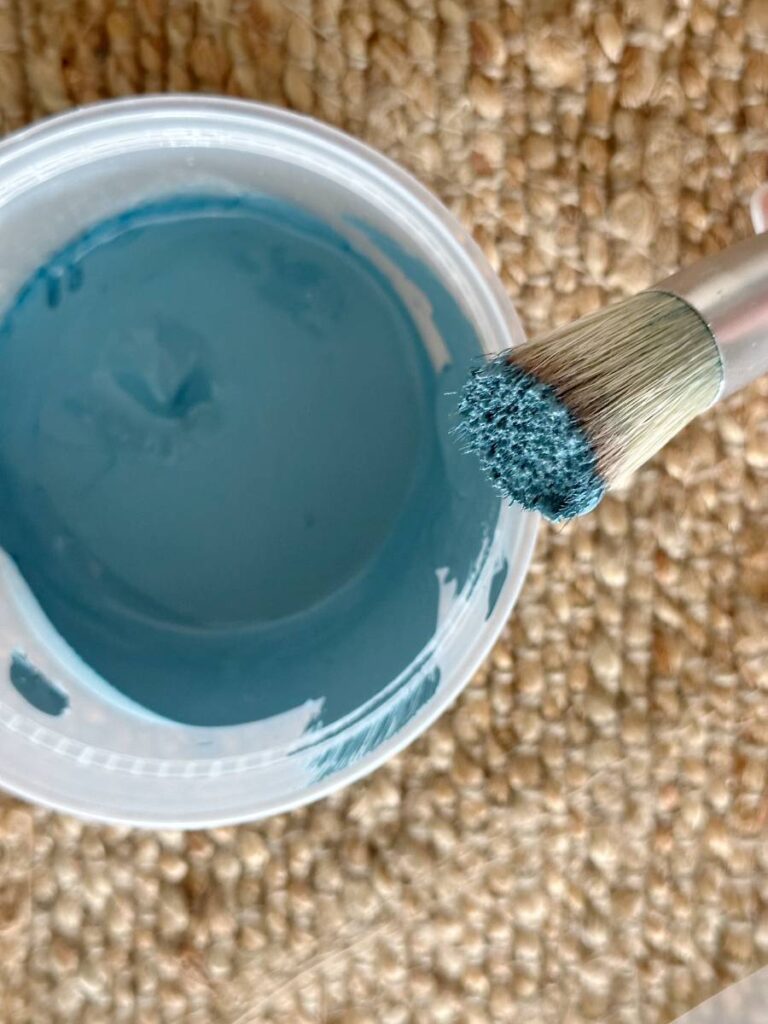
Using a stencil brush, start painting your design.
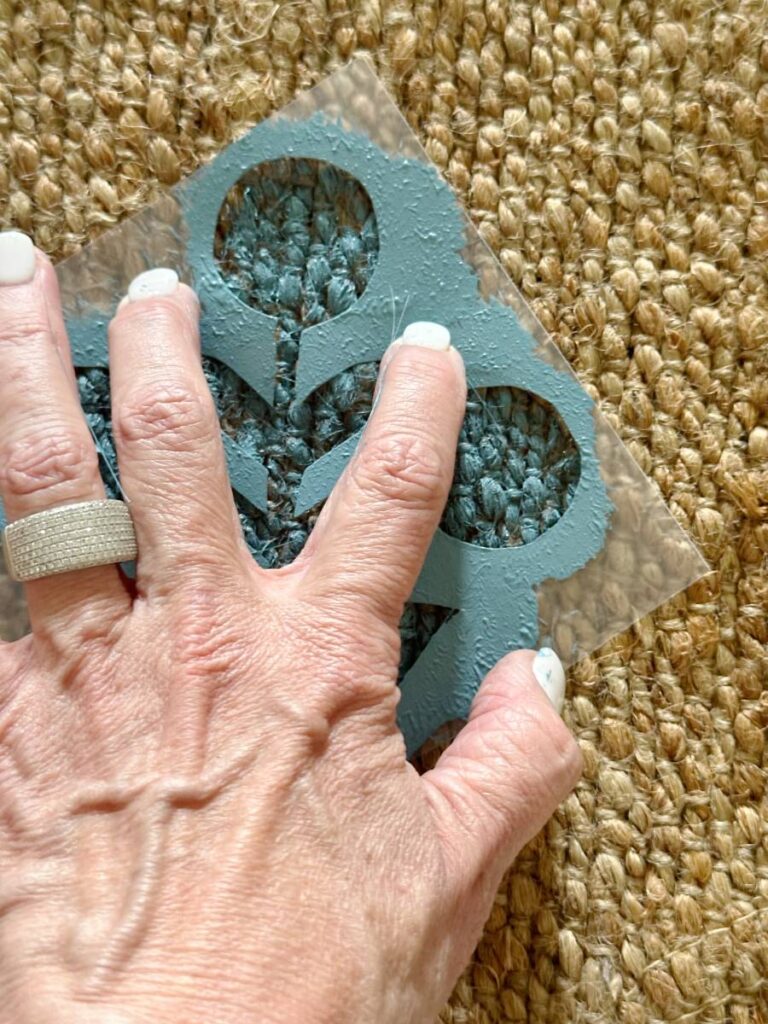
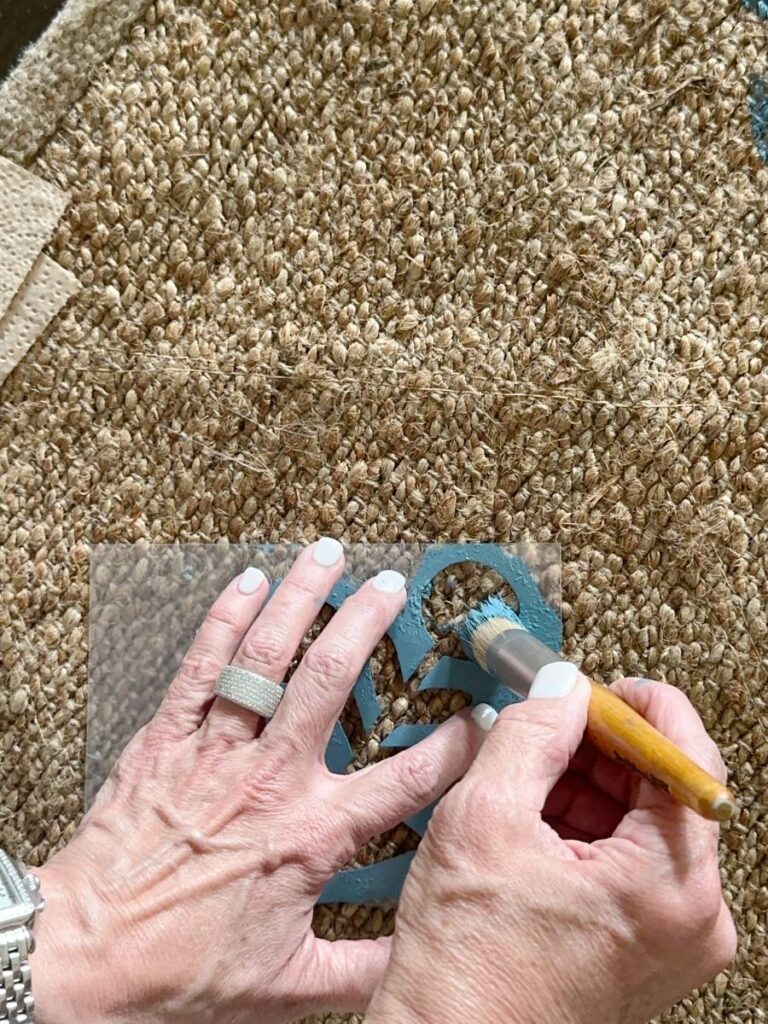
Be sure and hold your stencil down as much as possible as your are stamping the paint so the stencil doesn’t move around.
If you feel more comfortable, you can also use painters tape or masking tape and tape your stencil down to help prevent it from moving around.
If your paint is fairly thick, it is helpful. This will keep your paint from running underneath the stencil and outside the lines of your pattern.
The bottles of craft paint that I used were already fairly thick. But if you are using a paint that is more liquidy, you can pour it into a disposable container and leave the lid off for a while.
Being exposed to the air will thicken the paint up naturally.
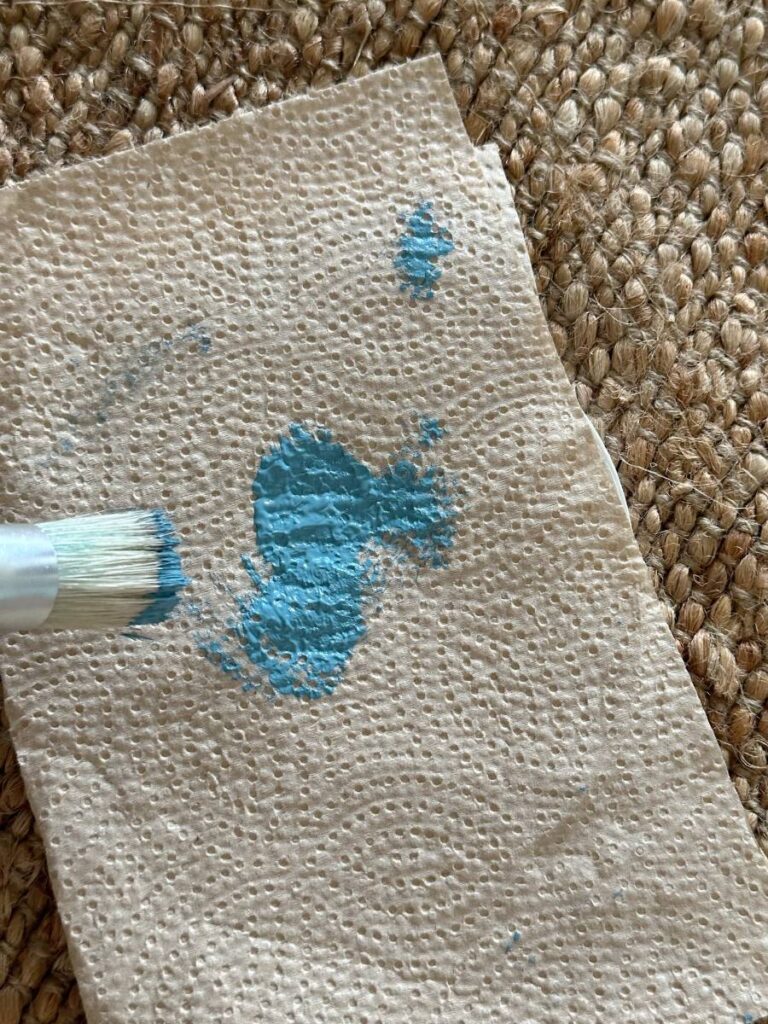

When you paint your design, if you will hold your stencil brush straight up and down and stipple or stamp the paint on, it will help keep the paint from seeping outside of the stencil lines.
Also, when you dip your brush into the paint, only get a small amount on the brush at one time.
Keeping a paper towel close by is helpful, so you can dab some paint off if you need to.
It is better to use a small amount of paint then add more, if necessary, instead of using a lot of paint and having it run underneath the stencil and ruin your pattern.
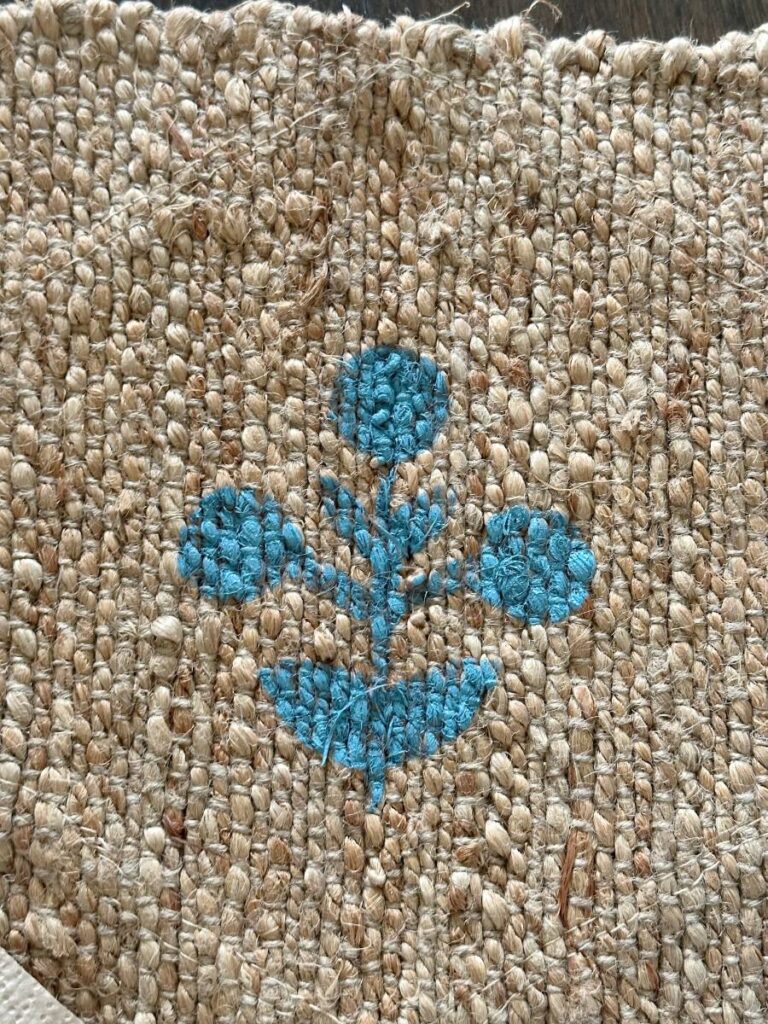
Continue stamping the stencil in every place you want your design until you achieve the desired look and pattern.
ideas and uses for a handmade block print rug
The possibilities are endless for a DIY block print jute rug!
There are so many sizes of jute rugs available from doormat size to very large rugs. You can usually pick one up for a great price.
A runner size is perfect for a hall runner or a kitchen rug. I recently purchased a block print jute rug runner for my kitchen before I decided to try and make my own.
I love it so much, I’m thinking about ordering a plain jute rug runner and making my own hallway rug.
You could make a large area size for a living room or dining room rug.
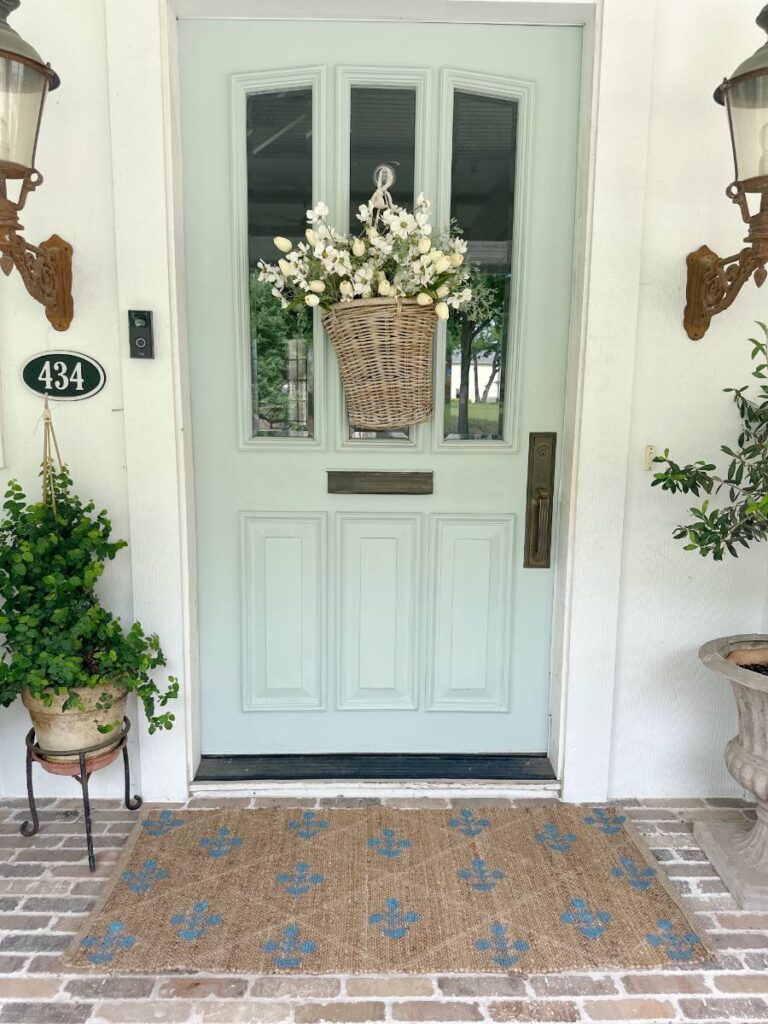
Or, make one to place in front of any door in your home. I created this one for a doormat rug to place outside my front door, but you could certainly use them inside your home, as well.
What about a cute custom bathroom rug or even a stair runner?
And it would be so cute for a kids room rug in a whimsical pattern and fun colors or even a baby room rug.
A hand painted stylish natural jute rug would be a great option for a patio rug.
I am currently working on a guest room makeover and think this DIY block print jute rug would make the cutest bedroom rug.
You can choose any pattern you like and use any paint colors that will go along with your home decor.
If you need block print ideas, look around for shapes and patterns you like. You can print something out from your computer or trace around something that is a shape you like.
Then cut out your design to trace onto your stencil paper.
Did you know you can purchase a table runner and placemats in jute? How about making block print designs on those for your table decor?
And wouldn’t one of these rugs make such a fun and unusual gift for someone?
handy tips for jute rugs
If you are placing a jute rug on a hard floor you might want to consider rug gripper tape or a rug mesh pad to prevent it from slipping.
It might be a good idea to avoid using your handmade beautiful jute rug in high-traffic areas since they aren’t easily cleaned.
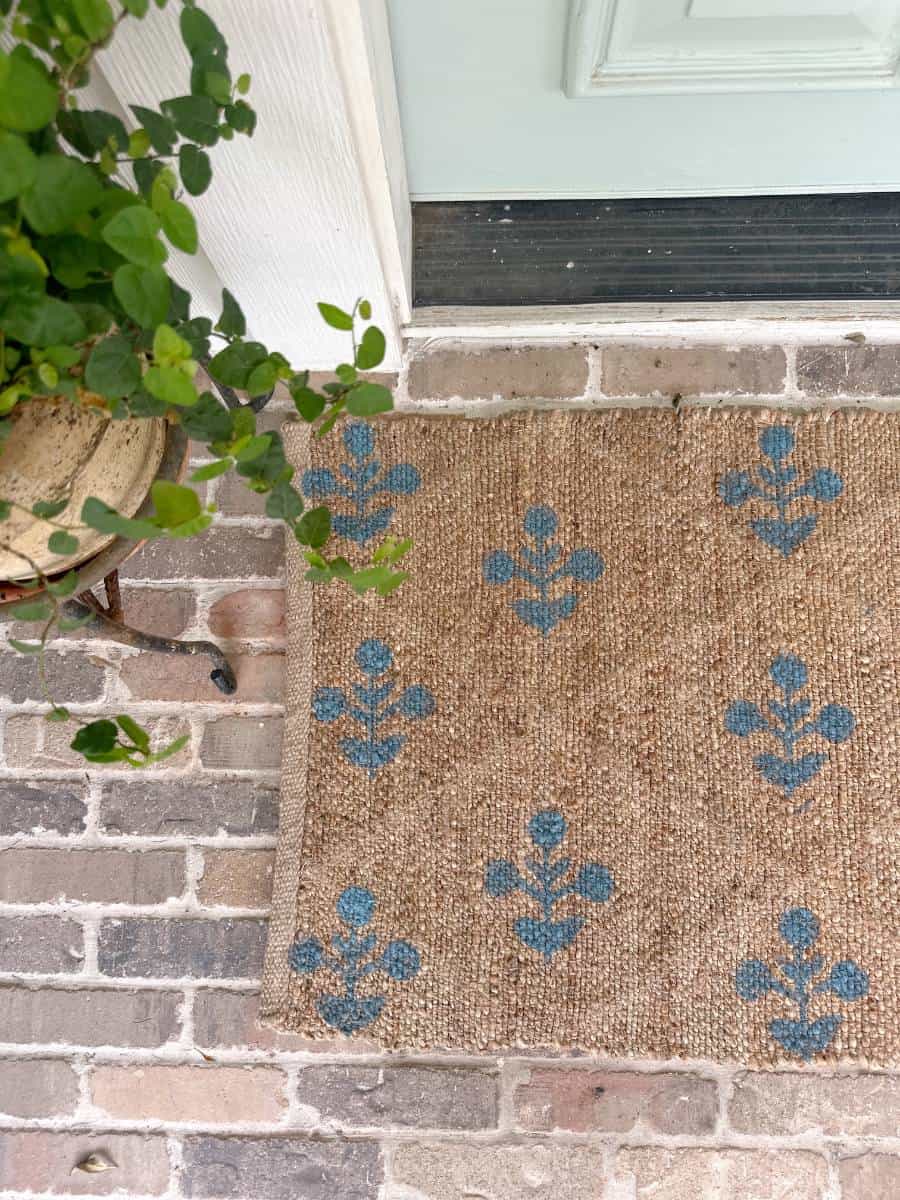
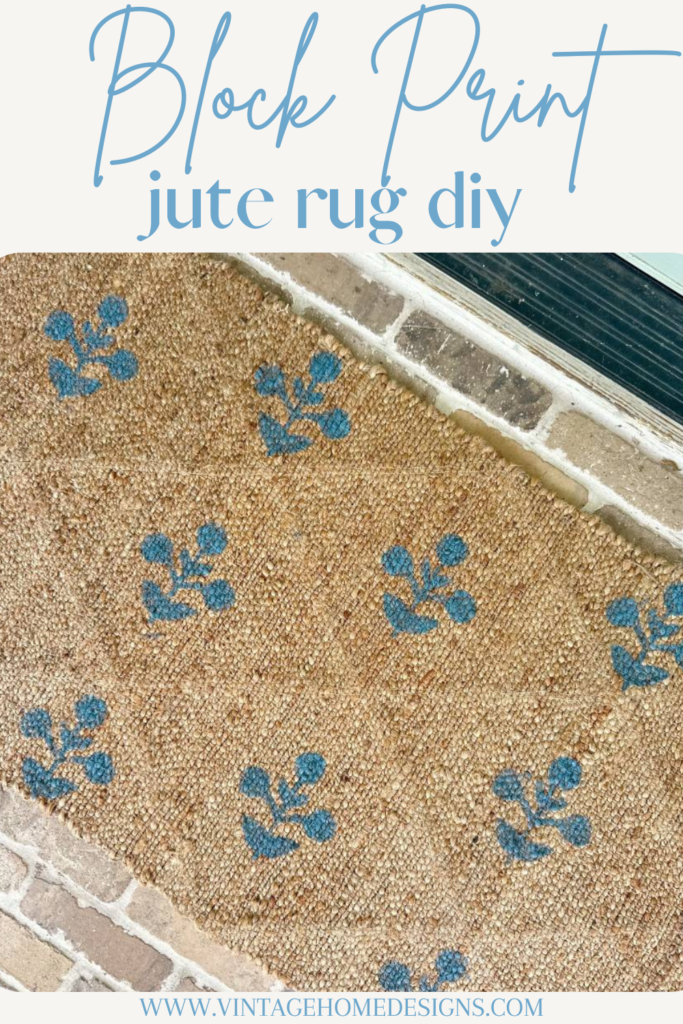
This made such a cute entrance rug into my home and created an authentic handmade rug look for my front porch.
I hope you enjoyed seeing how to make a DIY block print jute rug!
I would love to hear if you make one for yourself.
blessings,
If you enjoyed this post, be sure and Pin It to remember it…
shop the post

Beautiful! Perfect for your porch.
This is a fabulous idea, Michele! I just love how it turned out!
Thanks so much! So glad you like it!
What a great idea!!! Loved how it turned out!!!
Thanks so much! So glad you like it.
What a great idea. I love the look and you’ve given clear instructions. I will definitely be attempting this for my front door mat.
Thank you!
Karen B.
Oh good! I’m so glad you liked it and are planning to try it out. I would love to hear if you do.
This is soooo cute Michele! I am so going to do this.
Oh good Diane! I’m so glad you like it!
Michele, thank you for this fabulous idea. Your instructions are very helpful! And your suggestions for other things to stencil have inspired me too!
I am so glad you like the idea and found inspiration here!