How To Make A Topiary With Live Boxwood Cuttings
I just love live topiaries! Unfortunately, I have a problem keeping them alive inside the house. I tried this recently and love how it turned out, so I want to show you how to make a topiary with live boxwood cuttings.

supplies for a boxwood topiary

This post contains affiliate links which means if you purchase something, I make a small commission at no additional cost to you. Thank you for supporting my blog. You can read my full disclosure here.
terra cotta pot or vase/container of your choice
stick or dowel rod
stirofoam to fit container
boxwood cuttings
clippers
floral tape
moss
hot glue gun
twine
scissors
how to create a topiary with boxwood cuttings
First of all, you want to place a piece of stirofoam inside your container.
For this particular topiary, I used a terra cotta planter and the stalk of a live topiary I already had, that had died.
But if you are starting fresh, you will cut a piece of stirofoam to fit in the bottom of your container.
Make sure it fits snug into the container. You might even want to hot glue it to the bottom of the pot, just for stability.
My topiary had a dowel stick placed next to the stalk, and the two were secured together with green floral tape.
I didn’t like the look of it, so I removed the green floral tape and replaced it with pieces of twine.

Next, you will insert your stick or dowel inside the center of the stirofoam. I would recommend securing that with a little hot glue, as well.
You don’t necessarily need to add a dowel stick beside your topiary stalk unless you are using a fairly small or flimsy stick. Then you might want it for stability.
adding your boxwood cuttings


Cut small pieces of the boxwood and begin attaching them one at a time to the base using floral tape.
Continue adding until you get the desired fullness you want.
Remember to keep turning the topiary as you work so that you get a nice even fullness all the way around.


The pictures above show the “in progress” of the topiary.
Throughout the process of adding boxwood branches, I occasionally added a bit of hot glue in addition to the floral tape to help secure the branches.


These photos are after I got the fullness I wanted for my topiary.
If the shape is irregular you can trim it to the desired shape you want.
I wanted mine somewhat natural looking, so I didn’t do a lot of trimming.


When I was done adding my boxwood pieces, I finished the topiary off by glueing a bit of green moss around the base of the branches to hide the floral tape and any hot glue that might be showing.
I just left the dirt in my pot exposed, but if you are starting with a new pot/topiary and using stirofoam, you can either fill the pot with dirt around the stirofoam or add a layer of moss to the top to cover the stirofoam.
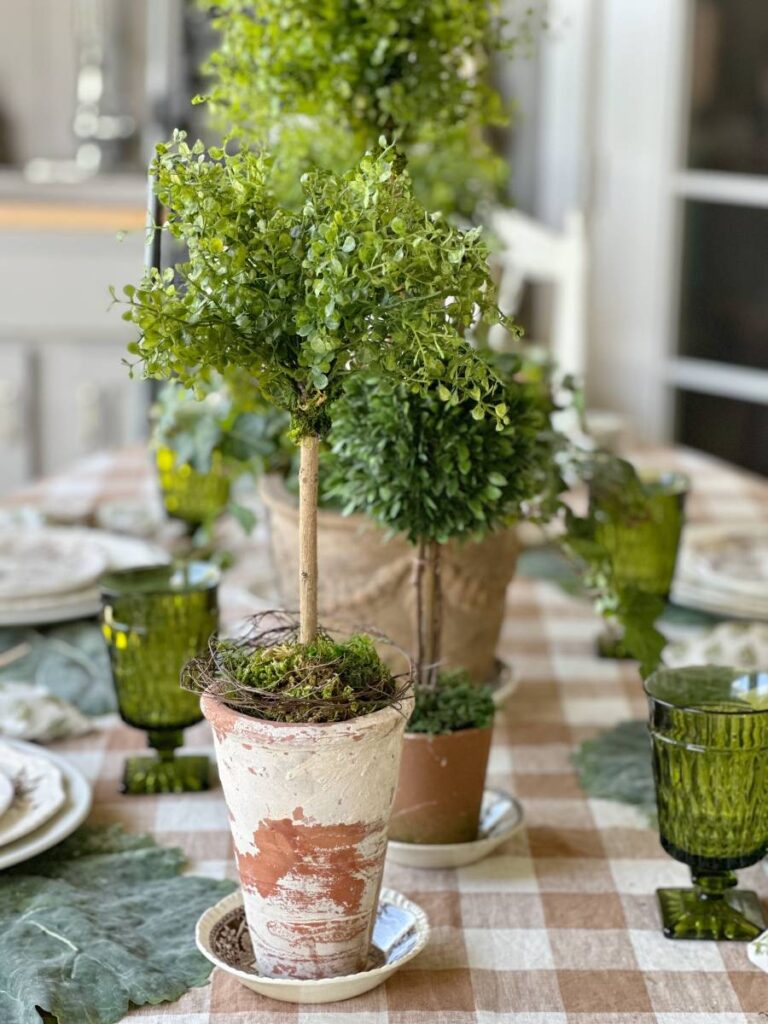
the finished topiary with live boxwood cuttings

And that’s it!
Super easy and inexpensive topiary.
I love how it turned out, and as I mentioned earlier, the boxwood will gradually dry out, but will look nice for quite a while.
I hope you enjoyed this post on how to make a topiary with live boxwood cuttings, and try one of your own.
Let me know if you do. I love hearing from you! “
Be sure and subscribe, so you don’t miss a thing.
blessings,

shop the post

And I would love for you to follow along on Instagram, Pinterest, and Facebook.
Be sure and Pin It to remember it…

If you enjoyed this post, you might like…
How To Make A Faux Topiary That Looks Real

Easy Table Setting Featuring a DIY Topiary Centerpiece
I love all kinds of topiaries and this one is adorable! I have a plethora of boxwood around so I hope to get this done soon. Happy Spring! pinned
Oh, I hope you try one, and so glad you like it!
Michele,
This looks great.
Thanks so much Rachel! I really appreciate that!
It’s so pretty!! Boxwood is just lovely in all forms. Beautiful job!!
Thanks so much Rachel! I really love how it turned out.
I love this idea. It is gorgeous. Hugs to you, my friend.
Thanks so much Renae! I really appreciate that!
This is adorable Michele. I’ll have to give it a try.
Thanks Wendy! Super easy and it lasts a long time. Have a wonderful Sunday!
What a great idea! I love to decorate with topiaries, and this is an easy way to create one! Thanks so much for sharing such a great idea!
Thanks so much Kim! I’m so glad you liked it! Happy Sunday
I love topiaries of all kinds! Yours is so beautiful and it looks easy to make! Thanks for the inspiration! Donna
Of course, Donna! I hopy you give it a try. Happy Sunday!
I love this beautiful idea, Michele. Can’t wait to feature this in my Saltwater Sounds post tomorrow.
Thank you so much Kim! I really appreciate that! Have a wonderful Sunday.
I love all of your spring decor Michele! so pretty
Thank you Wendy! I really appreciate that!
Love the project. Now, I need to find a stick and a boxwood in the neighborhood!!!! lol
Good Luck! It’s such an easy project and turns out so cute!
Your creativity is literally off the charts! I love seeing your amazing home and beautiful table scapes. Regarding the construction process of the topiaries, have you ever tried using the very fine green floral wire (approx 24 gauge) for the initial attachment of the stems? Once wired you can add glue and cover with a tight wrap of the floral tape and then hide all mechanics with moss. Using this procedure would possibly be easier for individuals that are “floral tape challenged” plus may be a little sturdier than your process. Yes, I am a semi-retired professional floral designer! 🙂
Thanks so much for the kind words!
And yes, I have used floral wire and use it occasionally for lots of projects, I just don’t typically use of for making topiaries, but that is a great idea too.