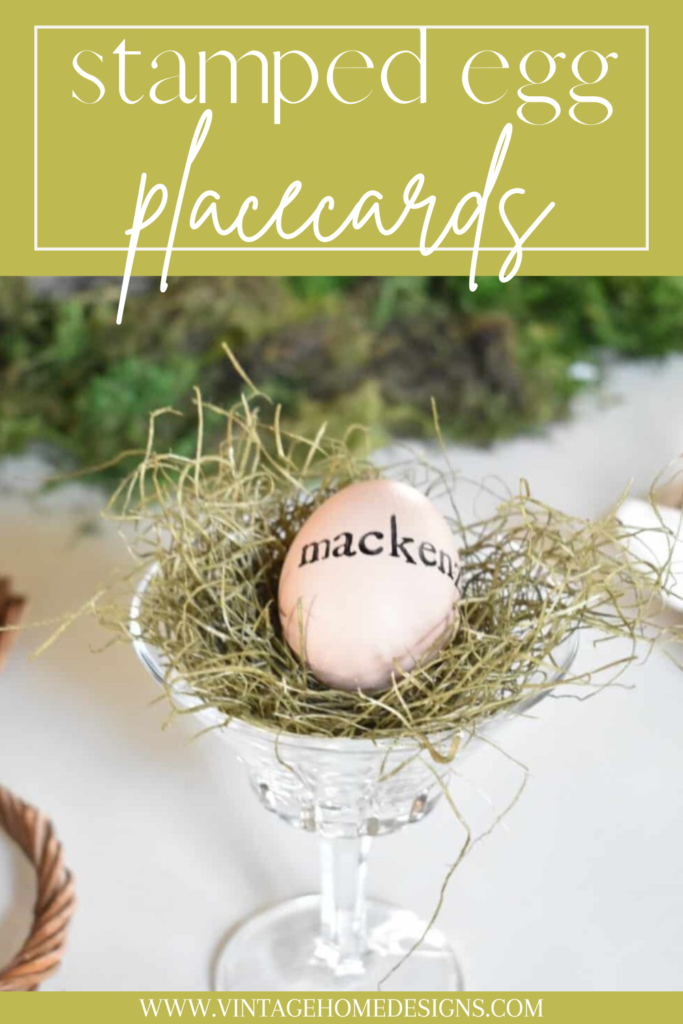
Stamped Egg Place Cards for a Spring Table
Ya’ll this is the easiest DIY ever!!! I made these stamped egg place cards for a Spring table and they turned out so cute!!
Follow along and I will show you how I did it. You won’t believe how simple it is!
I made mine for an Easter tablescape, but these would be so cute for any spring table.

supplies for stamped egg place cards

This post contains affiliate links which means if you purchase something, I make a small commission at no additional cost to you. Thank you for supporting my blog. You can read my full disclose here.
I used real farm fresh eggs (uncooked) but, of course, you could hard boil the eggs. You can leave them the natural color, use white eggs, OR…. you could dye the eggs a fun color!! Or all different colors!!
Another option is to use wooden eggs or papier mache eggs if you prefer not to use the real ones.
That way, they would last forever and you could reuse them every year.
I used a small lower case letter stamp and one letter at a time, stamped the name of each guest. I just eyeballed it, and didn’t have a guide for keeping it perfectly straight.

directions for stamped egg place cards
Just load your stamp with ink, and press the letter onto the stamp, making sure the entire letter is touching the surface of the egg.
I used black ink, but you can use whatever color ink you like. The ink pads are available in so many colors.
And that’s it!! See how easy that was.
ways to use your stamped eggs
I filled a vintage stemmed glass with moss and cradled the egg inside and put at each place setting for my Easter table.
You could get creative with what to display them in and just use something you already have.
I think another fun idea is to put inspirational words on them, and fill a bowl or urn.
It makes super cute Spring or Easter decor. Obviously, the real eggs wouldn’t last as long, so you would want to use wooden or papier mache eggs if you want them to last for a while.

I hope you enjoyed this tutorial for stamped egg place cards!
Take a look at my Spring Tablescape to see how I used them on my Easter table.
Let me know if you try some, because I love hearing from you.
Leave a comment and let me know how they turned out! And I would love for you to follow me on Pinterest, Instagram and Facebook.
Be sure and subscribe to the blog, so you don’t miss a thing! I love sharing inspiration, DIY’s, and home decor ideas with you.
blessings,
Pin It to remember it……
shop the post

Very cute and simple craft—how fun!!
Oh, so glad you liked it.
Thanks so much for following along and commenting!
Great Idea! Love that my grand kids can help or enjoy receiving them. (Of course not using real eggs. Ha) Always love seeing what you have created and that it is doable and not expensive.
Karen Walker
Thanks so much for your kind words and I’m so glad you enjoyed the post!
Happy Tuesday Karen!
Very cute idea!
Thank you! So glad you liked it!
I absolutely love this idea, Michele. It’s so simple but SO creative. And beautiful! Thank you for sharing. Pinned!
Thanks Jen! It’s such an easy Spring DIY.
Michele,
This is such a cute idea for an Easter table. Thanks for sharing your creativity.
Thank you Rachel. It was such a fun and easy DIY for Spring.
Thanks for sharing! I have an alphabet stamp set which I love using for addressing envelopes. There’s something so satisfying about stamping the name/word letter by letter! I look forward to trying this very cute idea! Pinned it!
Oh, I’m so glad you like it! Thanks so much!
What a cute idea michele!
Thanks so much Stacy! So glad you liked it.
THIS IS SUCH A CUTE IDEA. I LOVE IT. HUGS TO YOU.
Thanks so much Renae! I’m so glad you liked it.
Cute idea for an Easter table…and hey, probably cheaper than buying real eggs!!!
Thank you Jennifer. It was a fun and easy project.
Very cute idea! Love anything personalized on a table.
Thank you Wendy! They were fun and easy to make.